
The only way to avoid trusting hardware - Multisig


Last week, you learned how to remove an element of trust from your operating system and applications. We also learned how this is impossible to do with hardware.
I promised I’d teach you how to manage your on-chain assets in a trustless way without having to trust your hardware.
So let’s get to it, let’s set up your multi-signature wallet!
Prerequisites
You need 2, preferably 3 different wallets. I went with:
MetaMask browser extension wallet - seed phrase generated with MetaMask and backed up
MetaMask mobile app wallet - seed phrase generated in the app and backed up
Trezor - seed phrase generated with Trezor and backed up
In summary, I have 3 different wallets and 3 different seed phrases.
In the following steps, we’ll set up an EVM-compatible (works on Ethereum, BNB Smart Chain, Polygon, etc.) multi-signature wallet that will ensure your funds are safe even if you expose one of your seed phrases 🤯
Setting up the multi-signature wallet
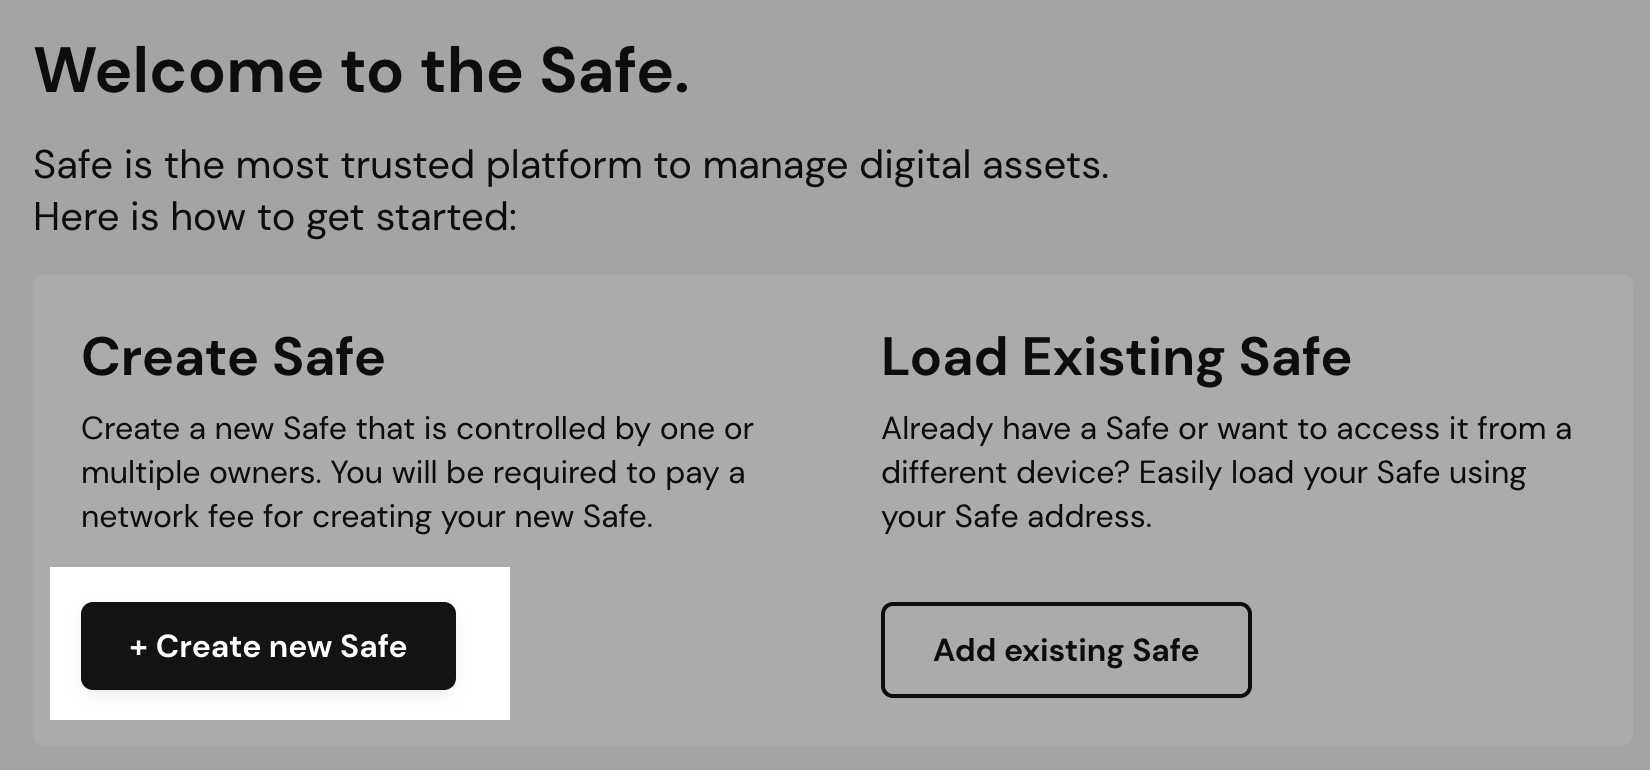
Step 1: Visit https://gnosis-safe.io/ and click ‘Open app’

Step 2: Click ‘Create new Safe’
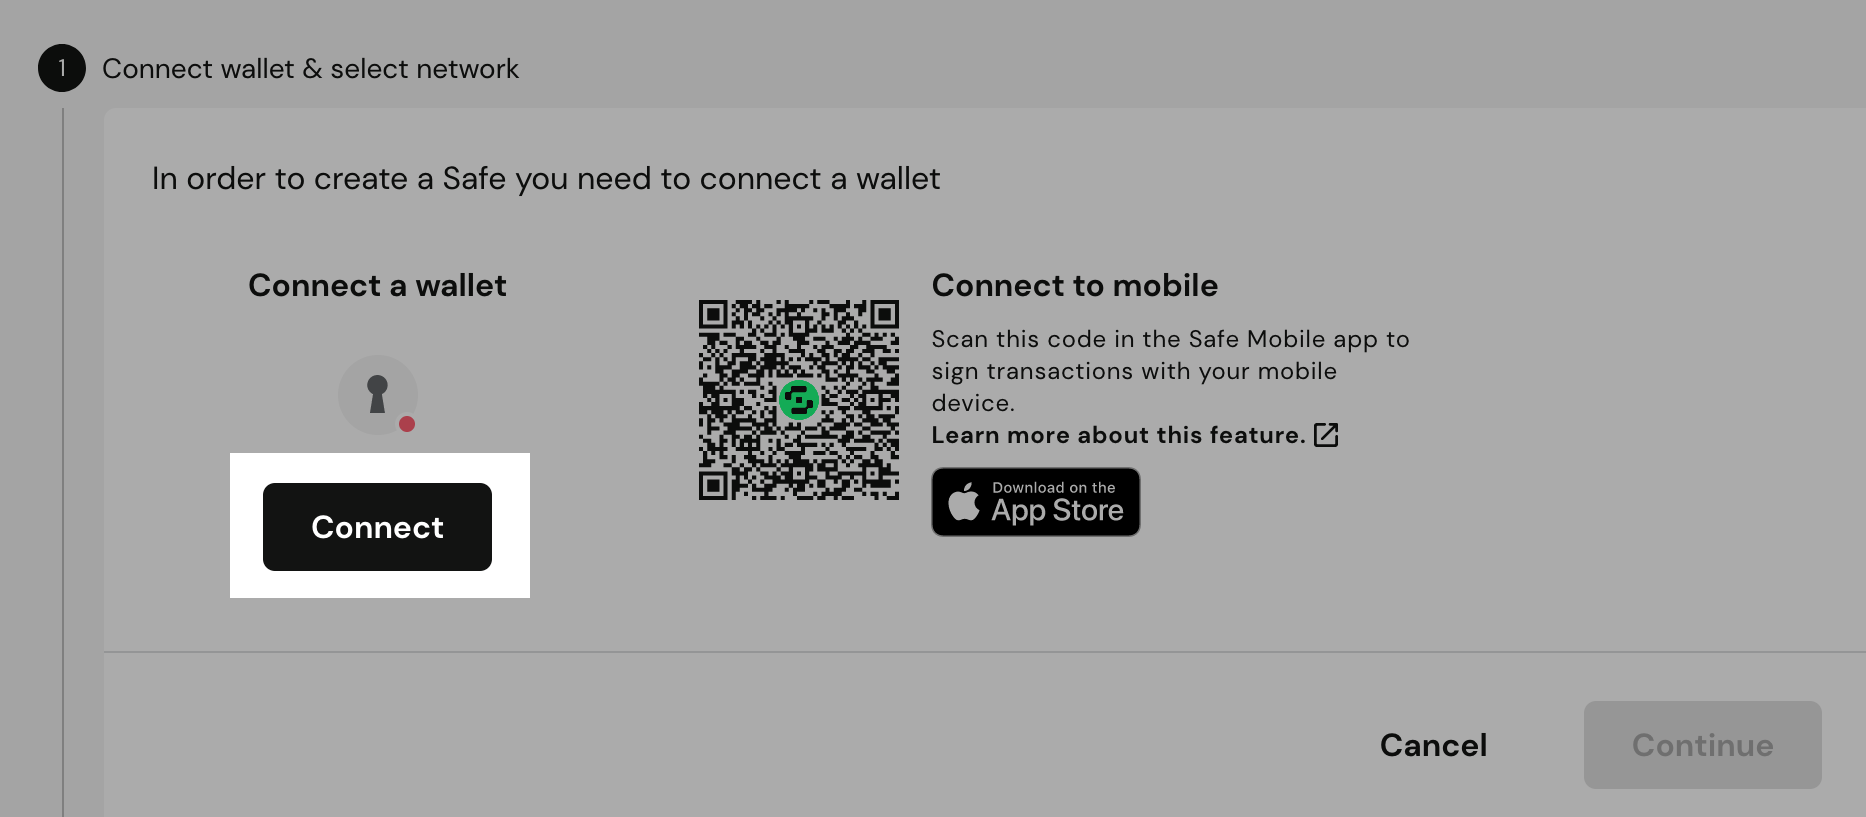
Step 3: Click ‘Connect’ and connect one of your 3 wallets. I’ve chosen to connect the MetaMask browser extension
Step 4: Choose the network you want to set up a multi-signature wallet for. I went with BNB Smart Chain.
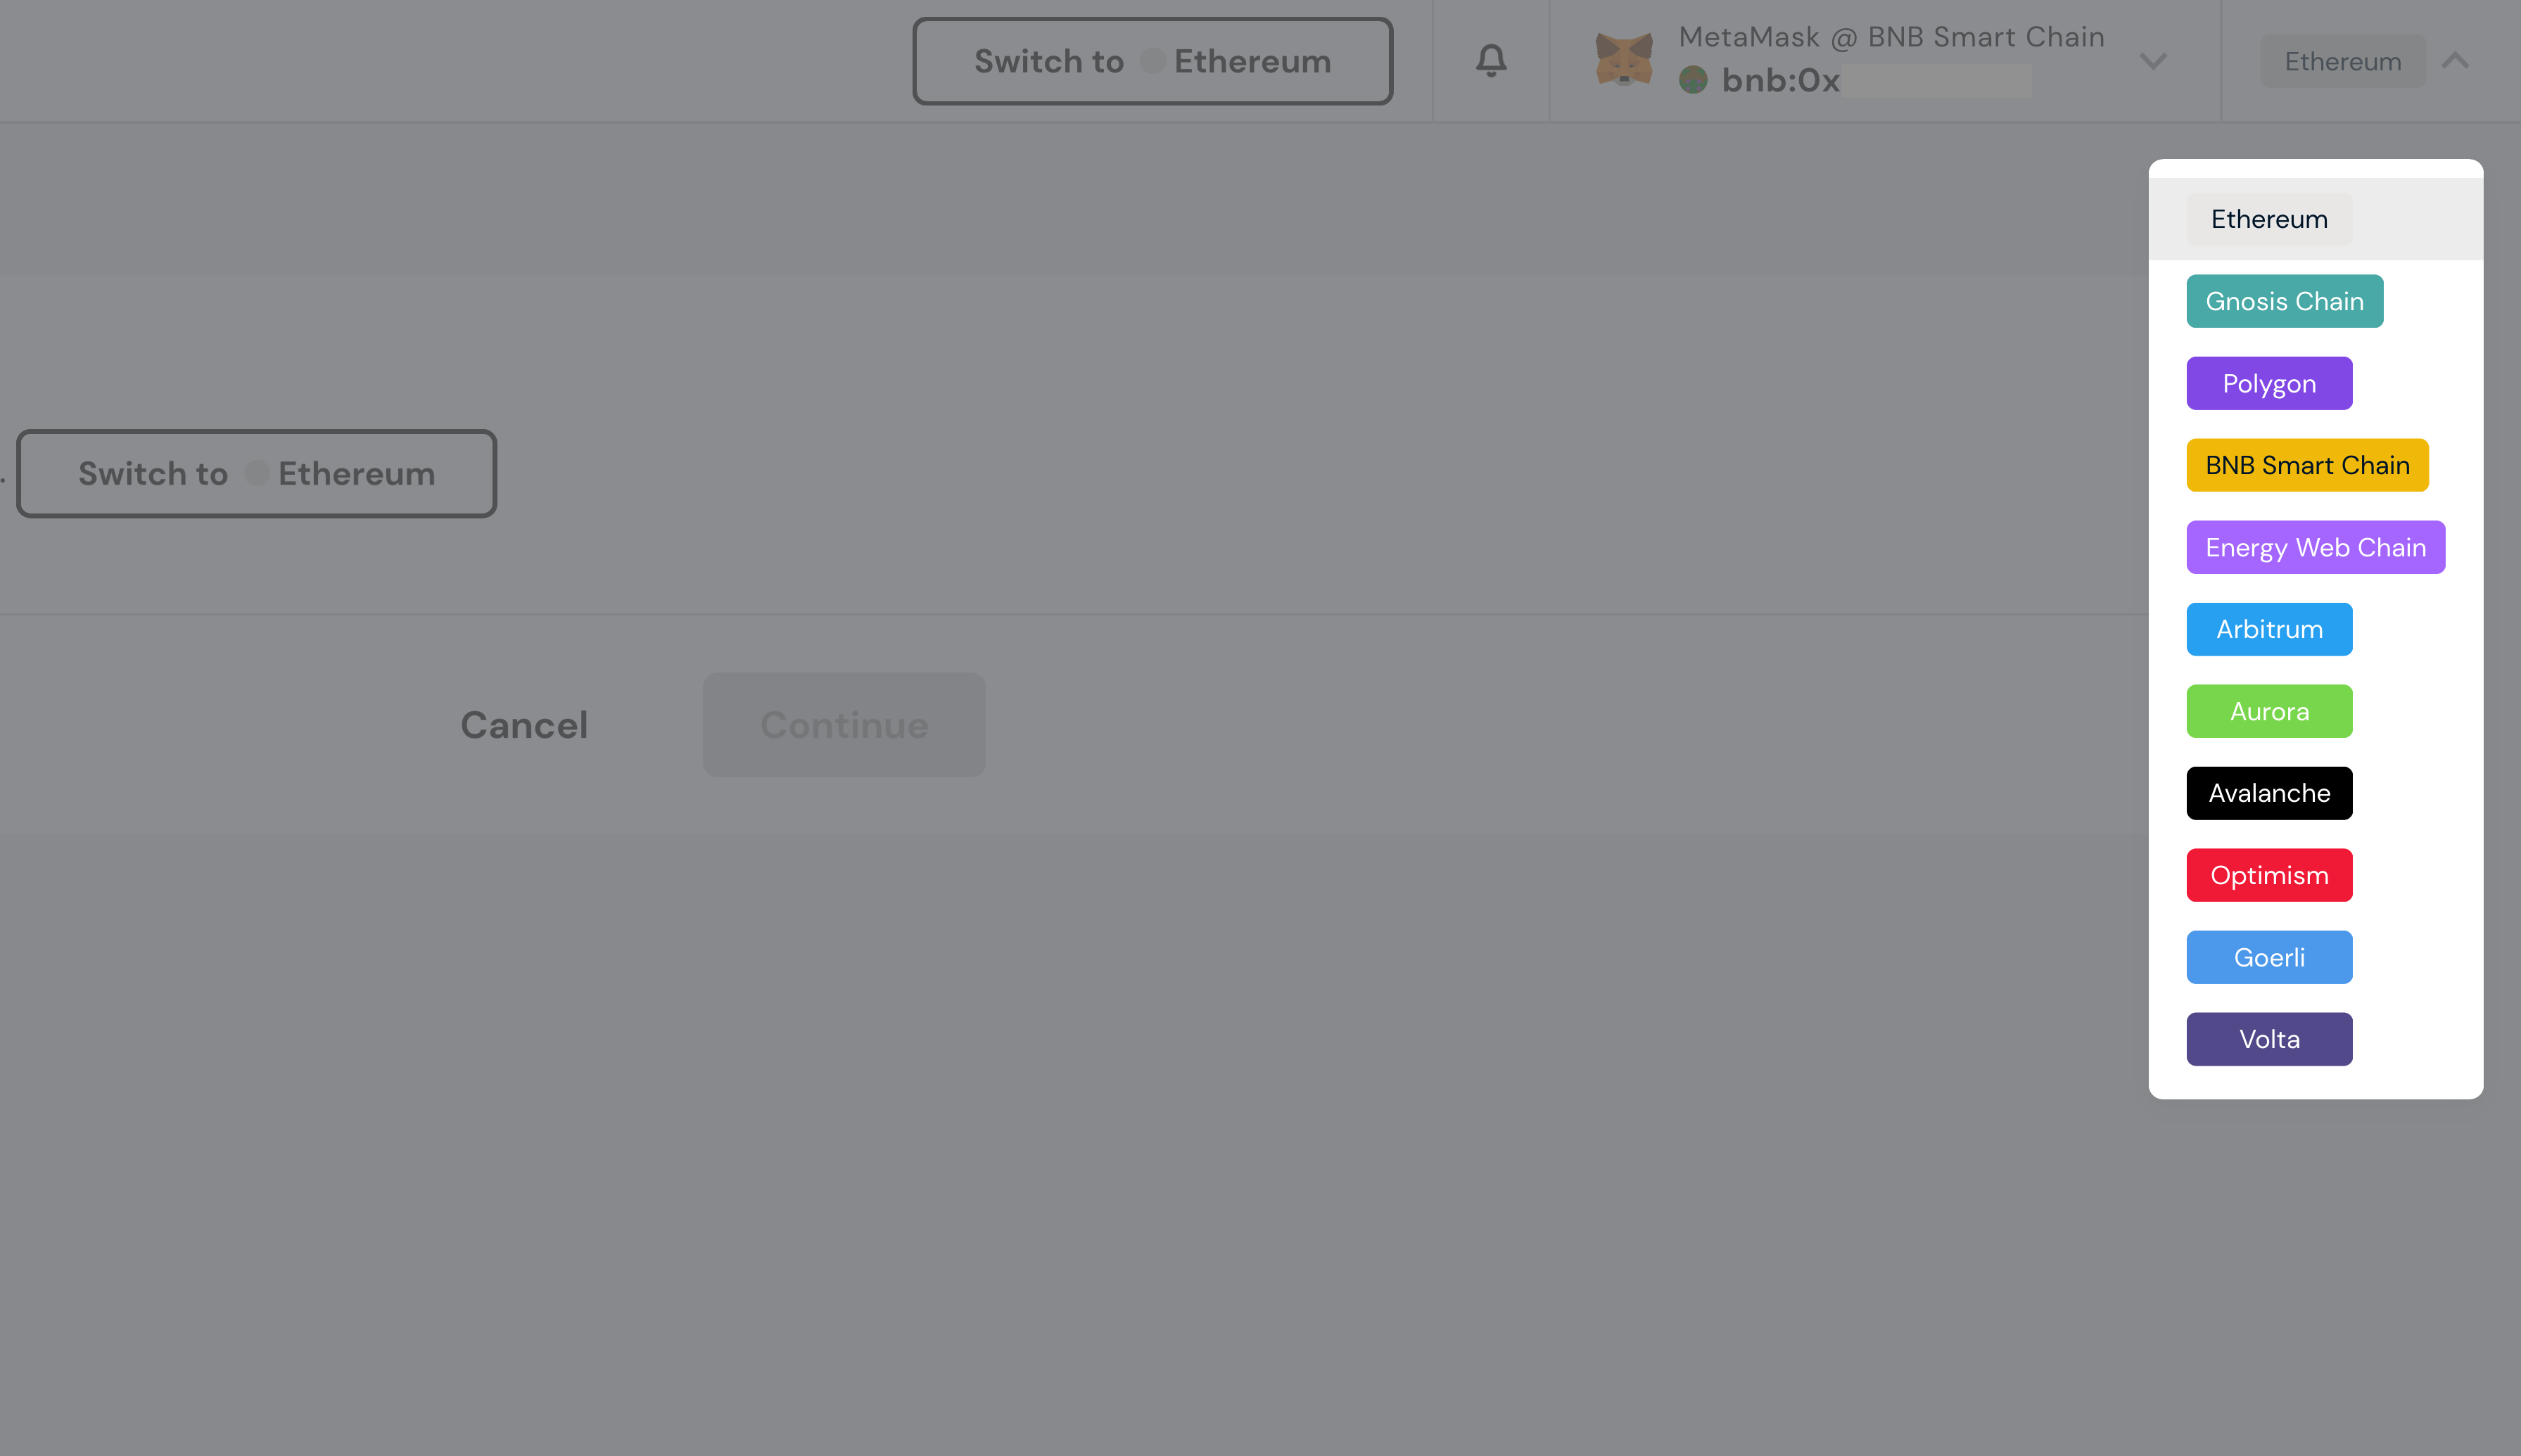
Step 5: Once both your wallet application and the network you’ve chosen are the same, you can continue
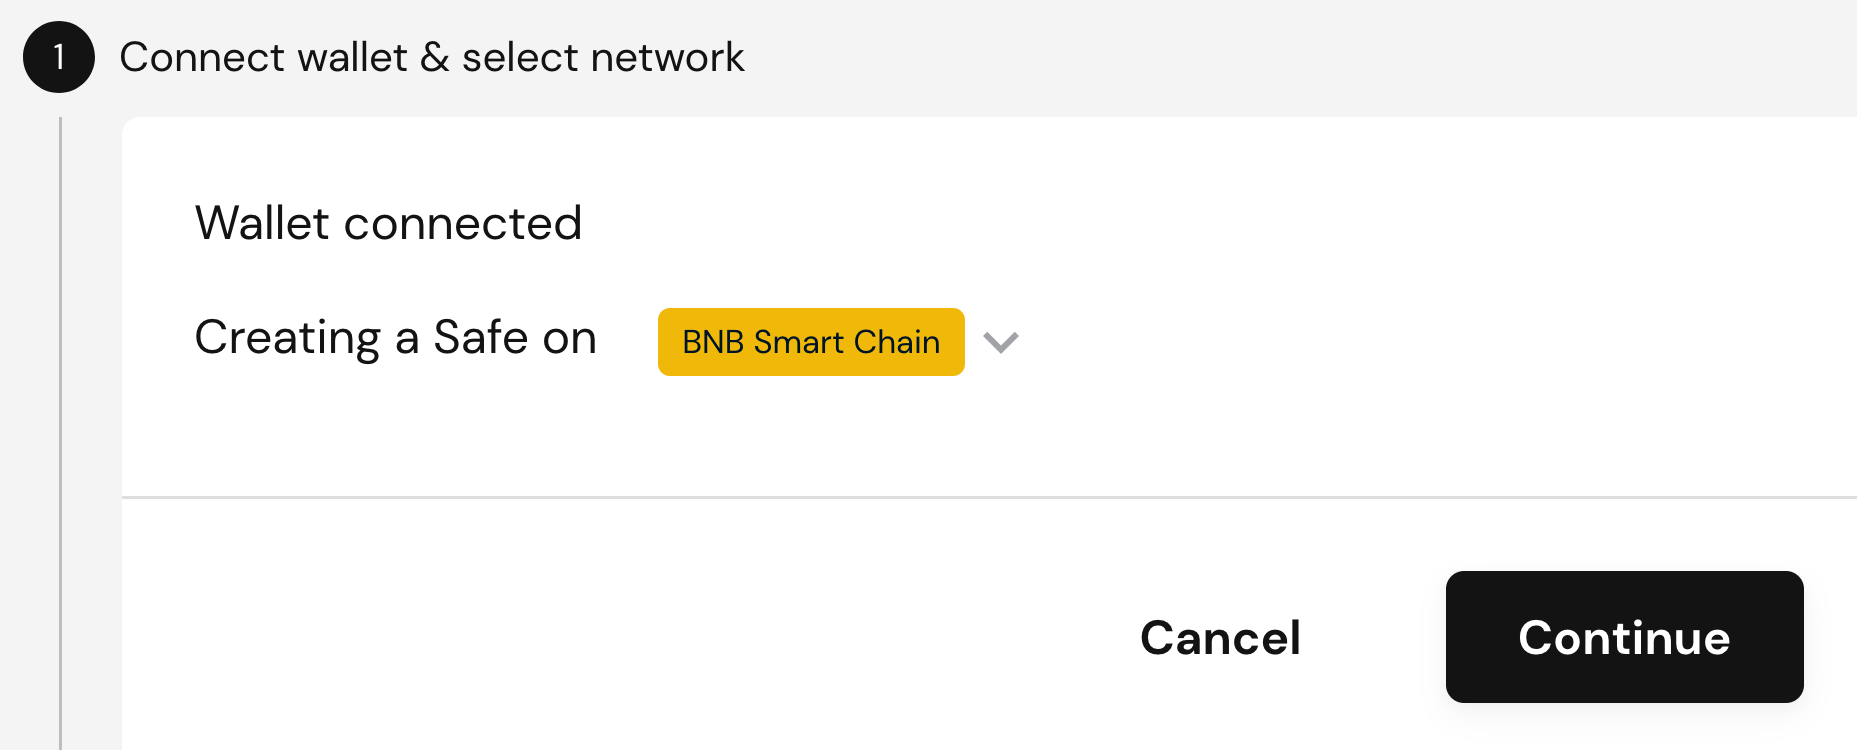
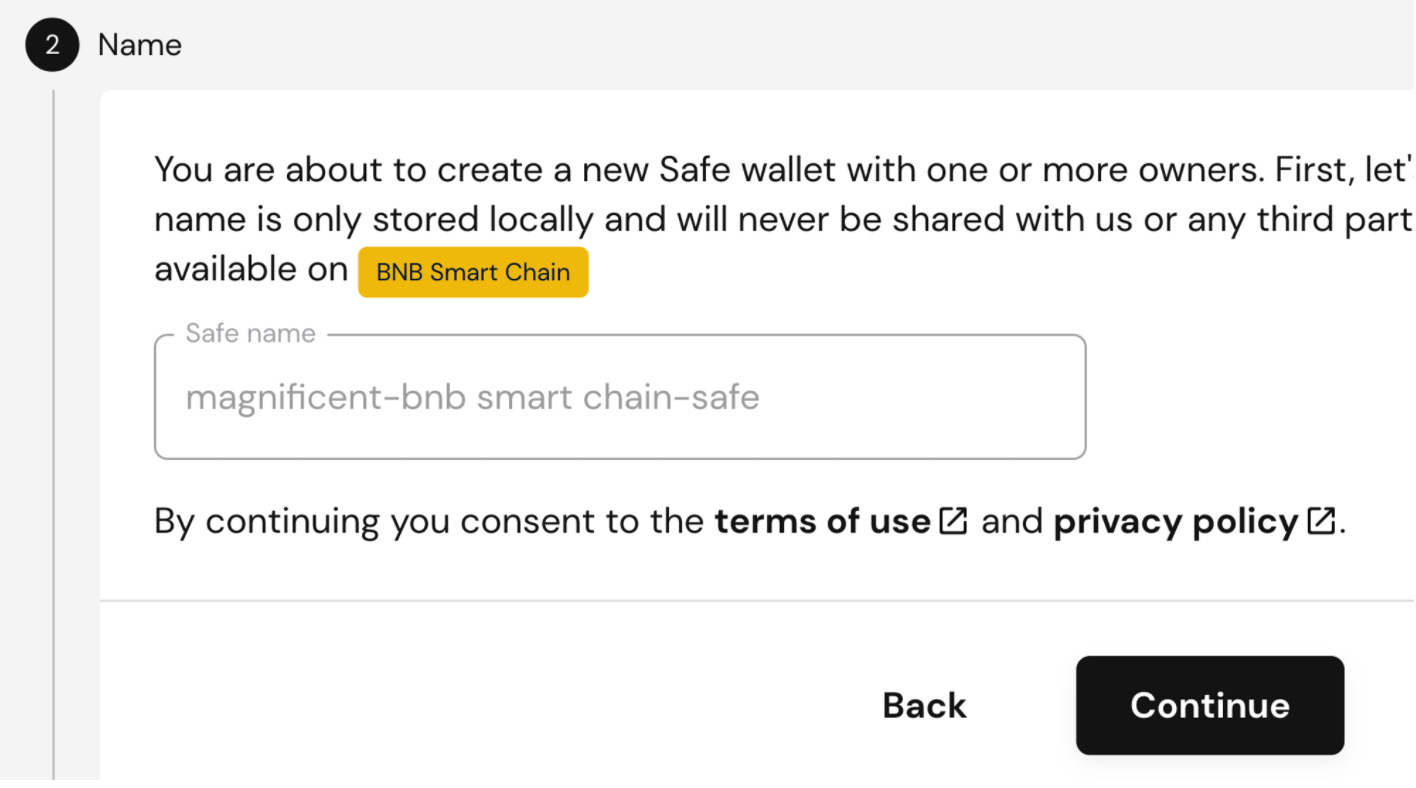
Step 6: You can give your safe a name. This will not be visible on-chain and can be changed later. I went with the default name by leaving this blank and clicking ‘Continue’
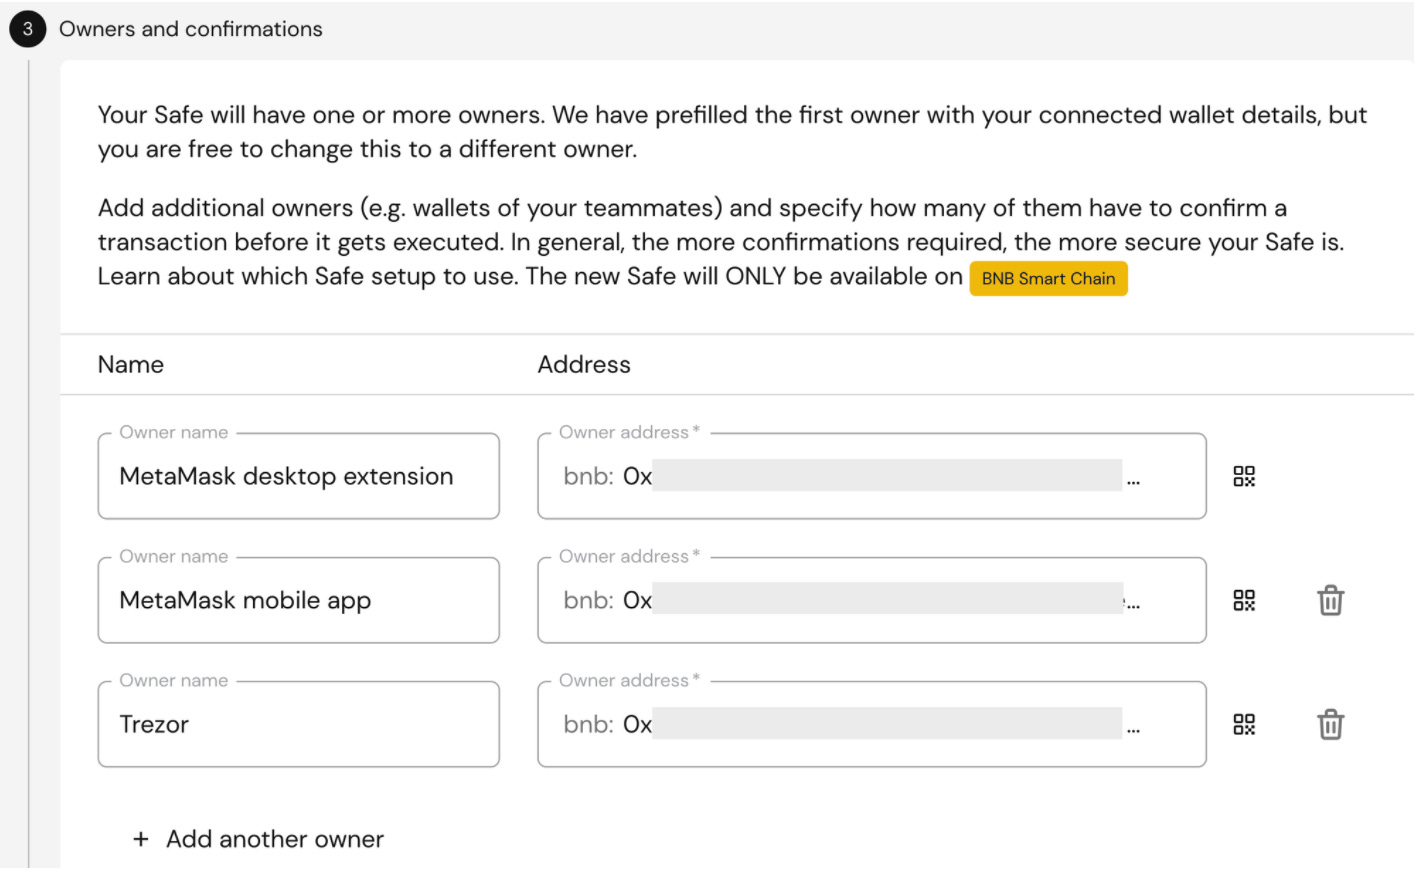
Step 7: Add owners by providing the public addresses of the other 2 wallets you’ve prepared. Since I connected the MetaMask browser extension, I’ve had to add the public addresses for my MetaMask mobile app and Trezor
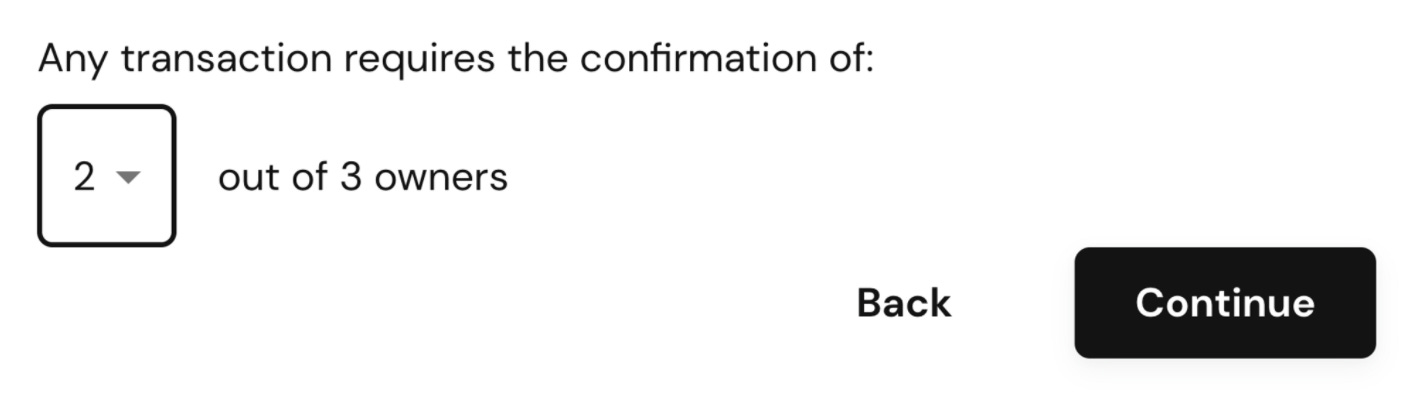
Step 8: Set up the 2 out of 3 signature scheme - every transaction you’ll make from your safe will require at least 2 signatures from 2 different wallets. That means:
One of your wallets’ seed phrases can be exposed, and the funds on your gnosis safe are still protected.
You can lose access to one of your wallets and its backups, and you’re still in control of your assets stored in gnosis safe.
Pretty cool, huh?
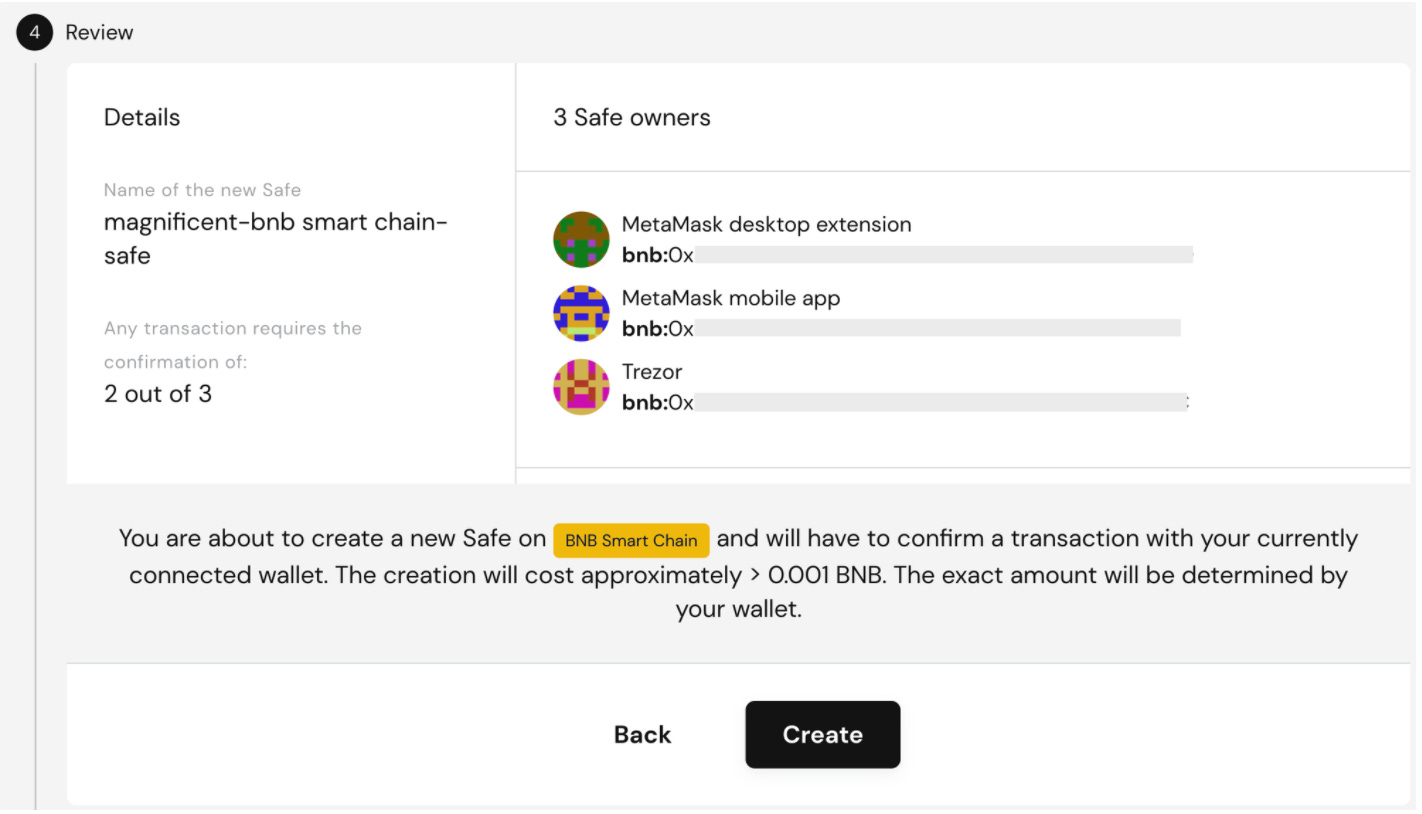
Step 9: Review and click ‘Create’
Step 10: Confirm the transaction
In this step, you’re deploying your gnosis safe wallet along with its configuration to the blockchain. You have to sign the transaction and it will cost gas fees.
Step 11: Wait until you see the dashboard for your gnosis safe
Great! You configured and deployed your safe to the blockchain!
In the top left corner of the screen, you can see your safe address (starts with bnb:0x).
You can transfer your tokens and/or NFTs to that address, to protect them with the multi-signature scheme. You can also share this address to receive payments.
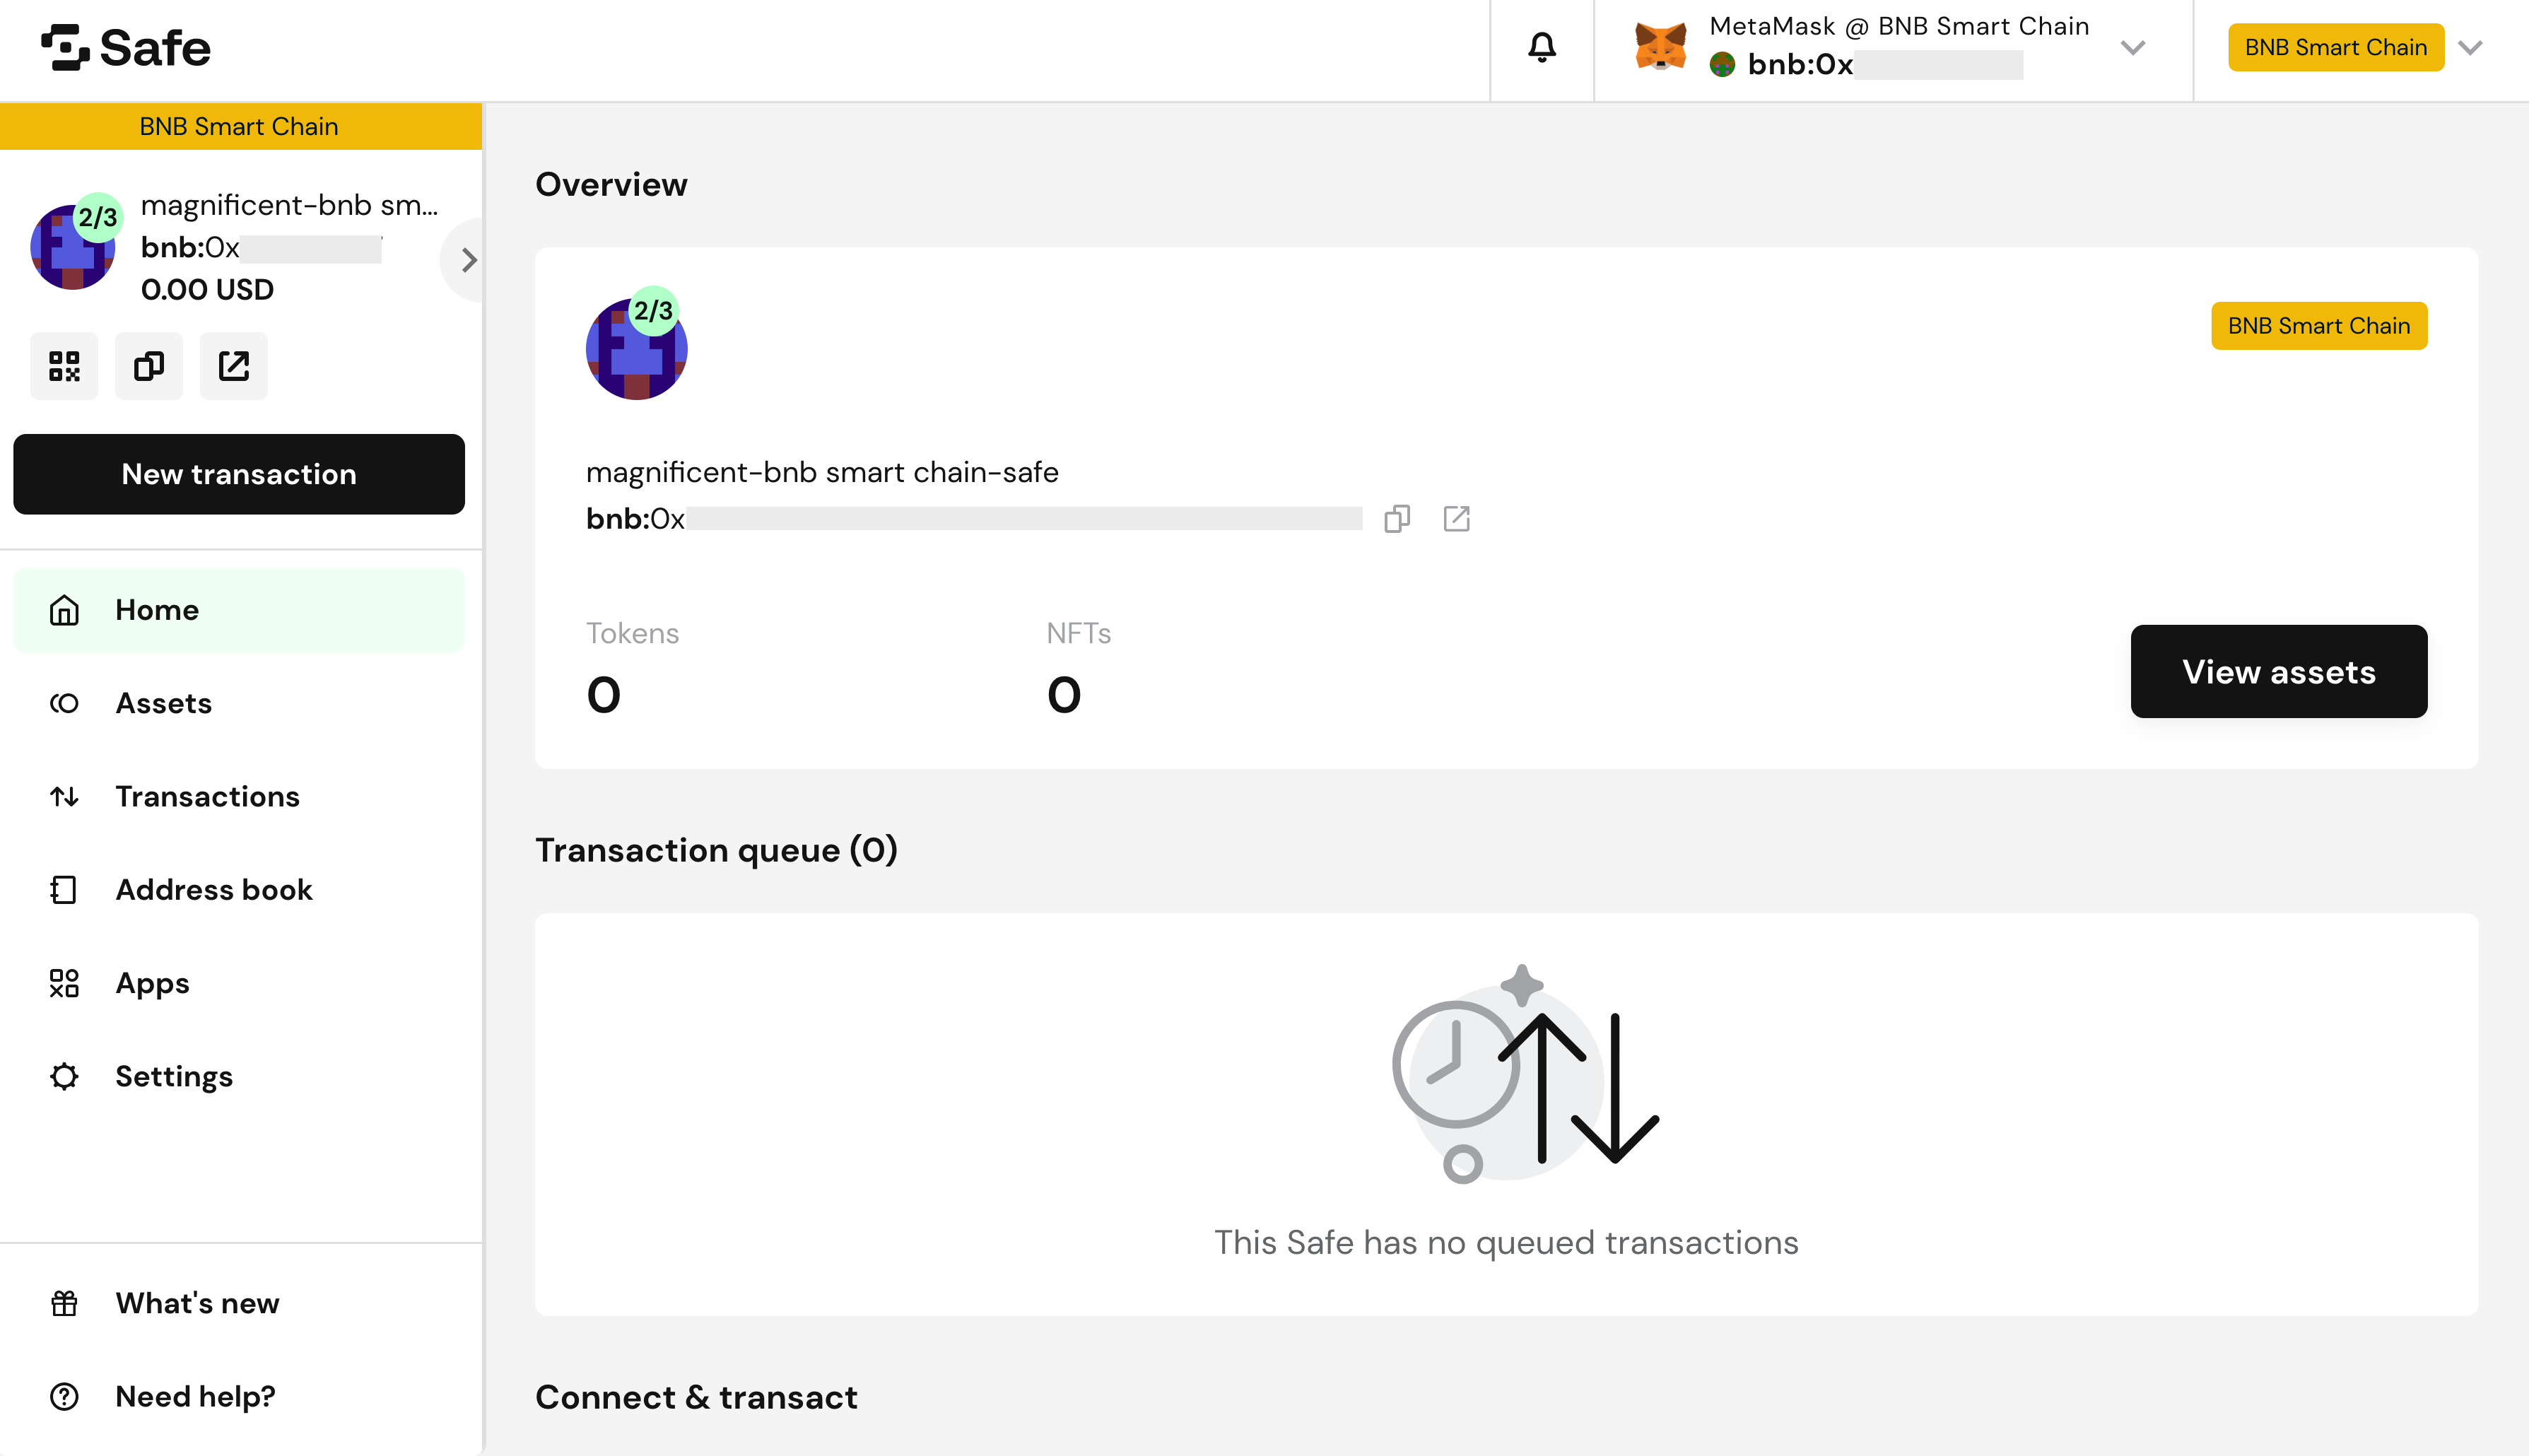
If you see this address in an explorer (etherscan, bnbscan, etc), you’ll notice it’s just a smart contract.

The application available at https://gnosis-safe.io/ is just a user interface to interact with that smart contract - you don’t need it. You can interact with the smart contract through bscscan or programmatically.
Everything you interact with is FOSS (Free and Open Source), so you don’t have to trust - you can verify what the smart contract and the app are actually doing.
Now, let’s say you’ve received some tokens in your gnosis safe and you want to send them to another address.
Making transactions
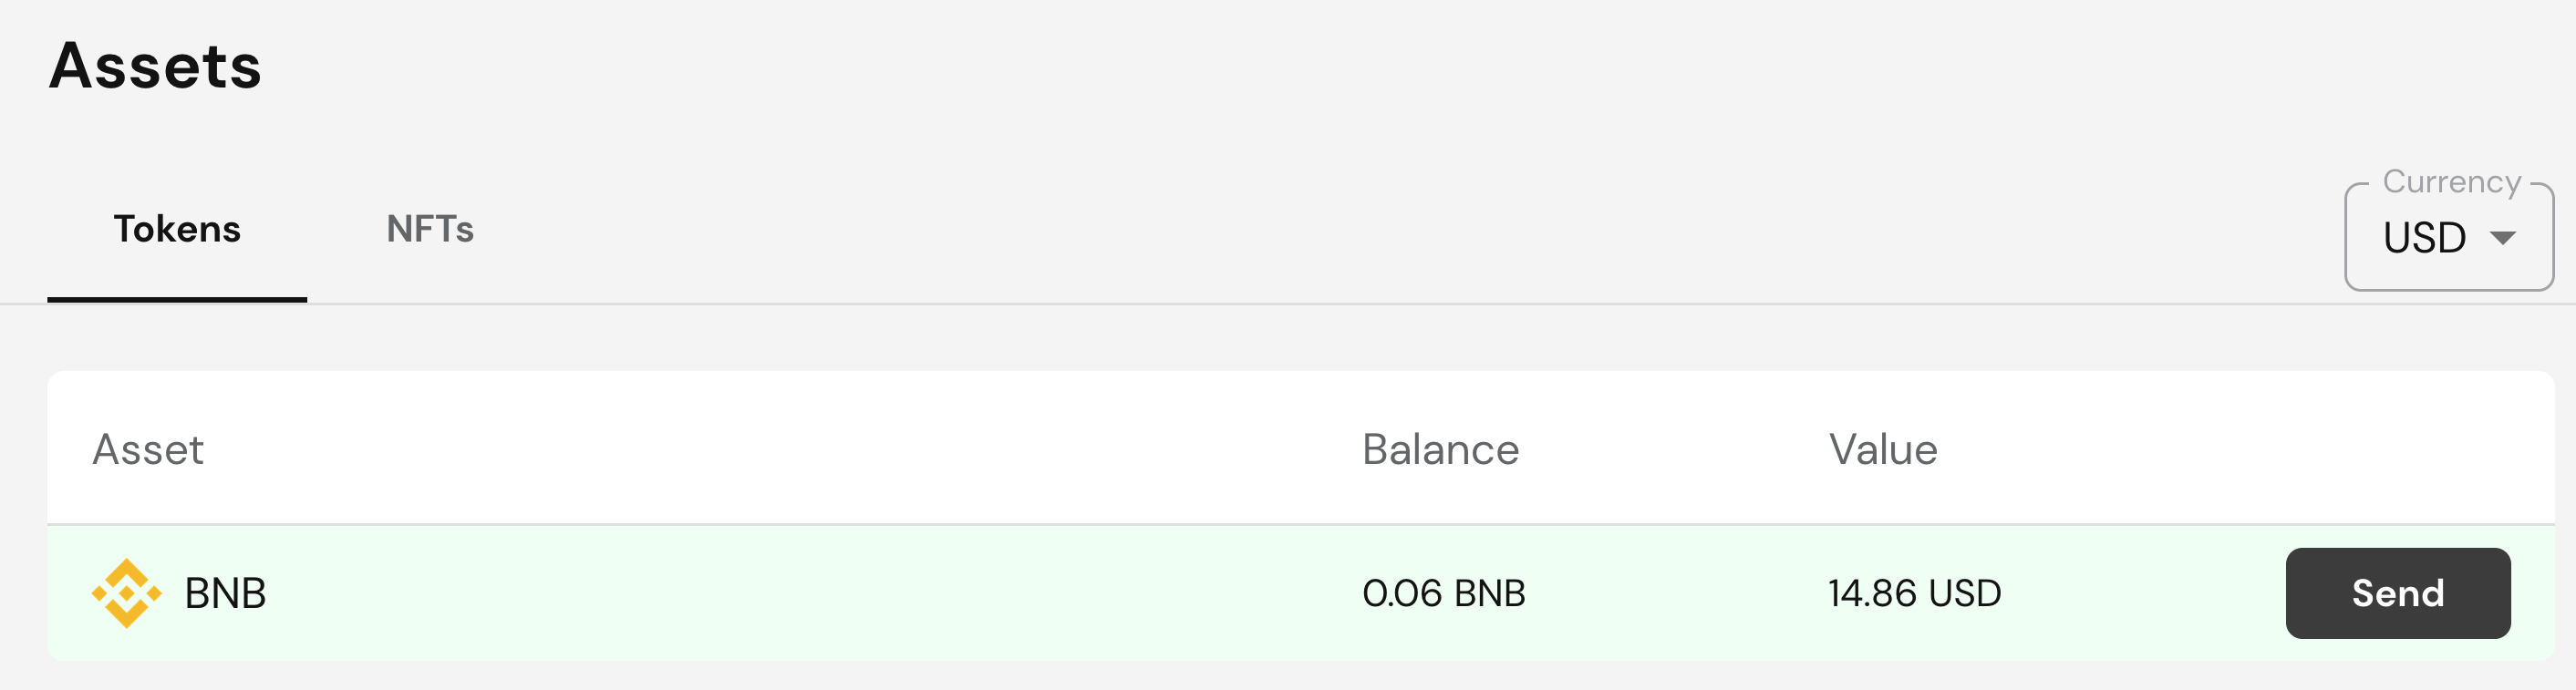
Step 1: Send a token
Go to Assets and click ‘Send’ next to the token you want to transfer.
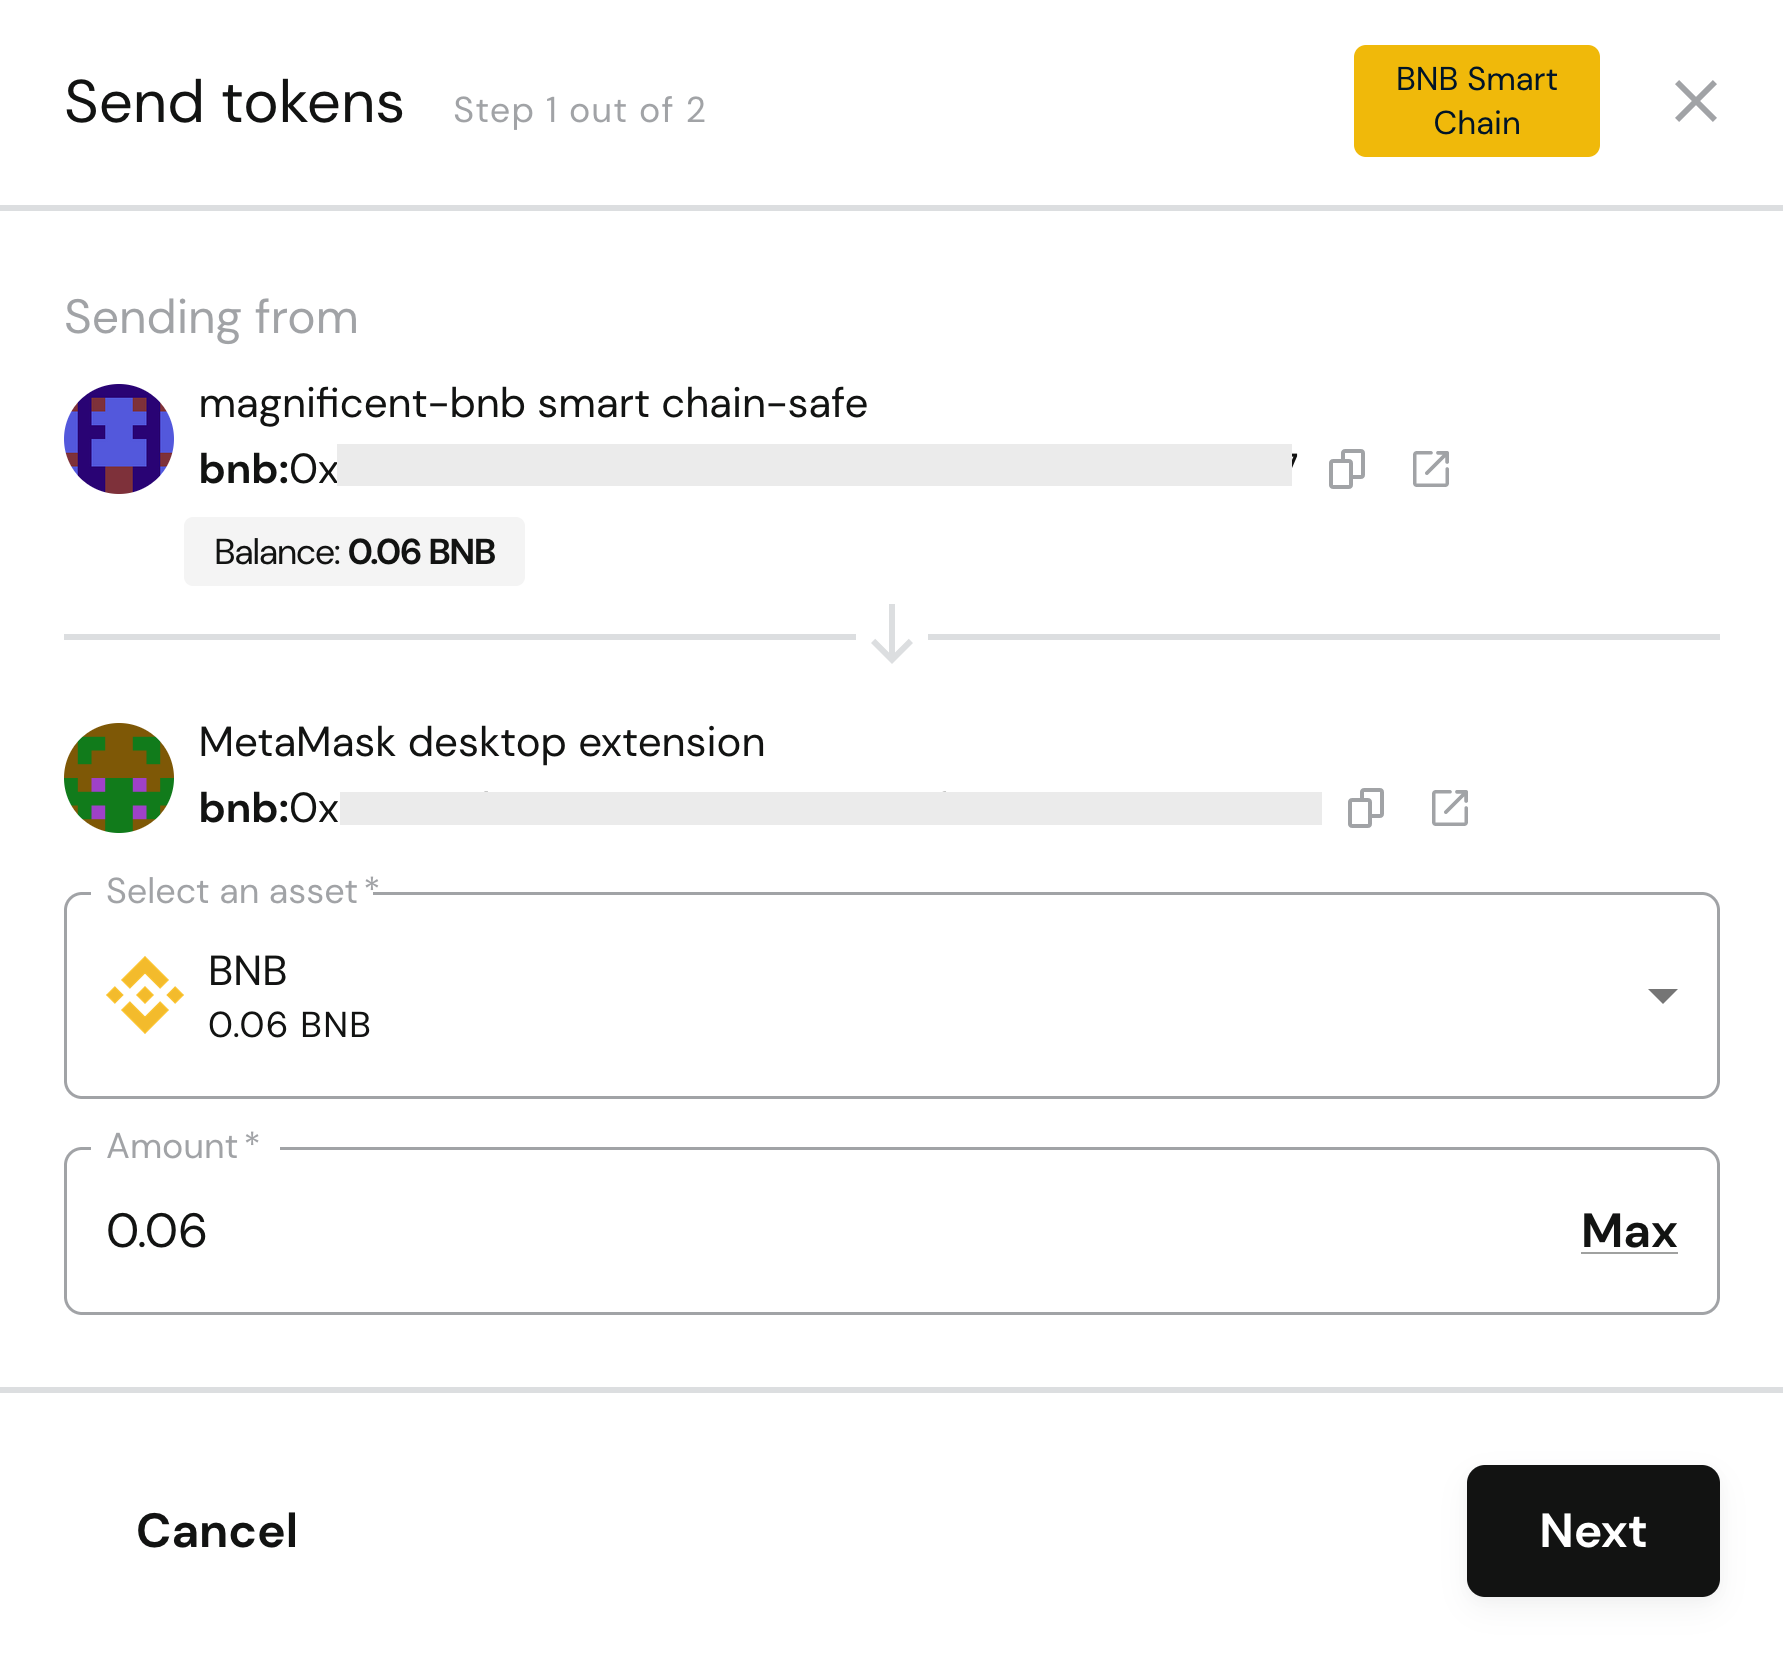
Step 2: Specify the amount and receiver address
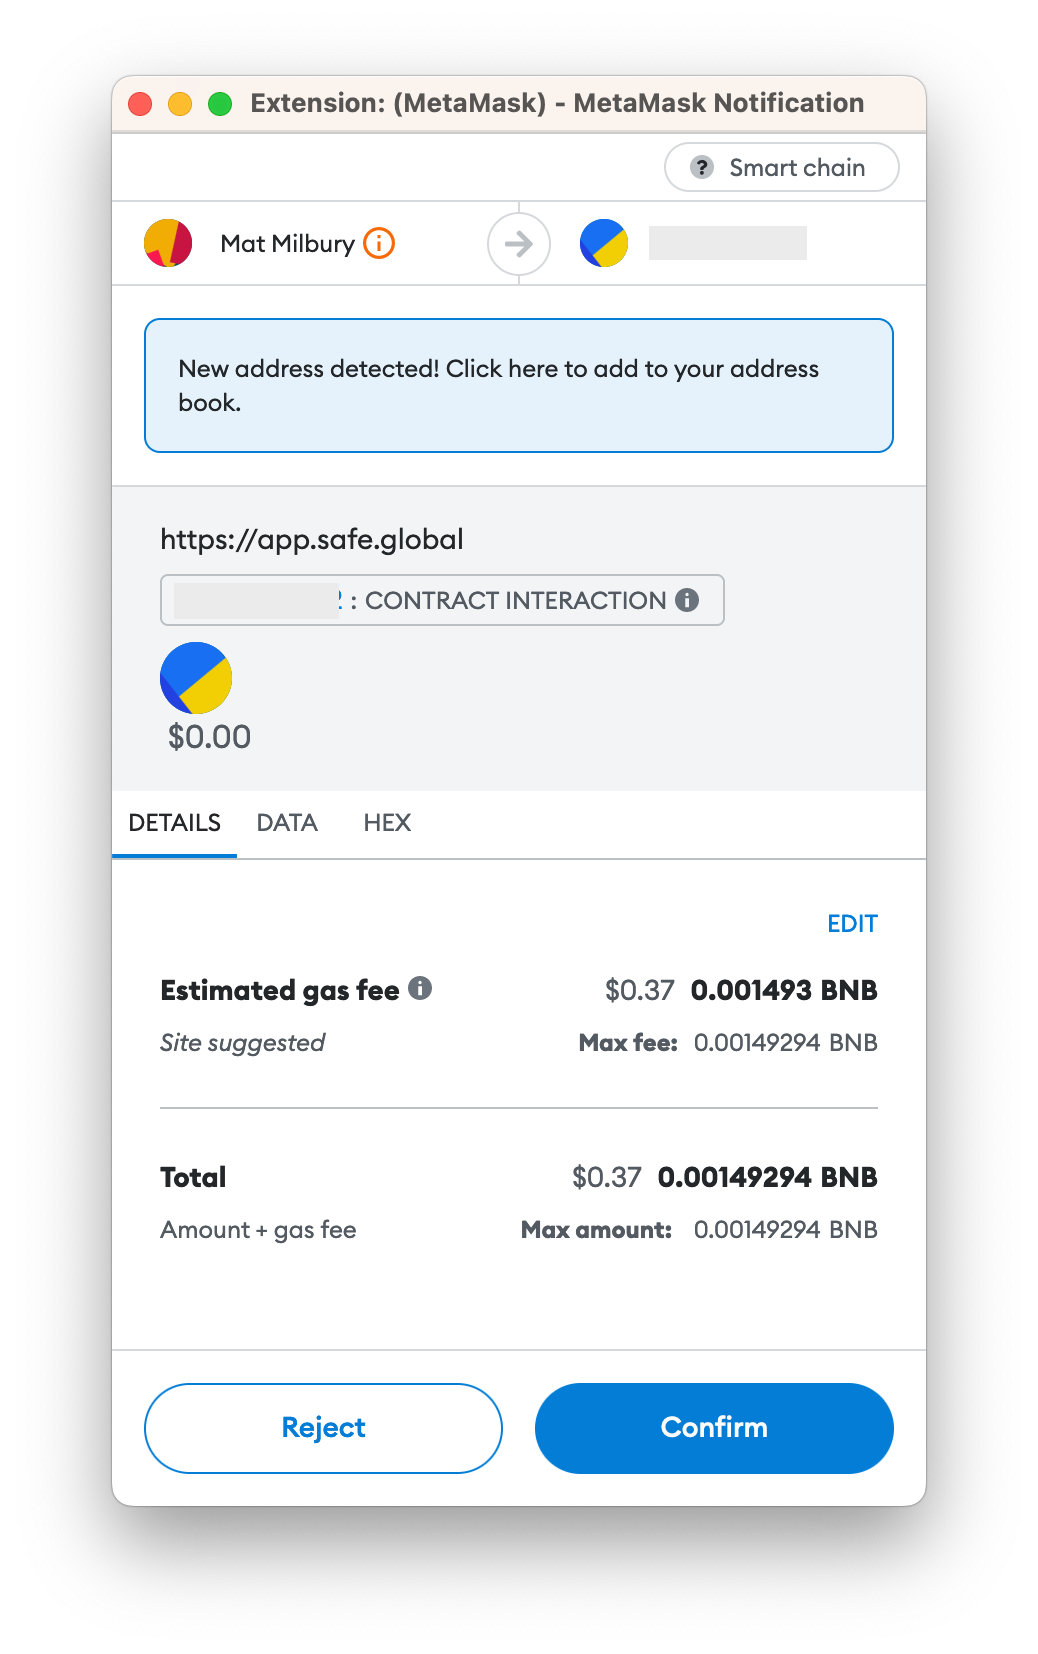
Step 3: Create the first signature
Now you have to sign your transaction.
Remember how you’ve configured your 2 out of 3 scheme? This means you’ll have to approve this transfer with at least 2 of your wallets.
Here you’re giving the first confirmation. It’s gas-less, meaning you’re not paying any gas fees.
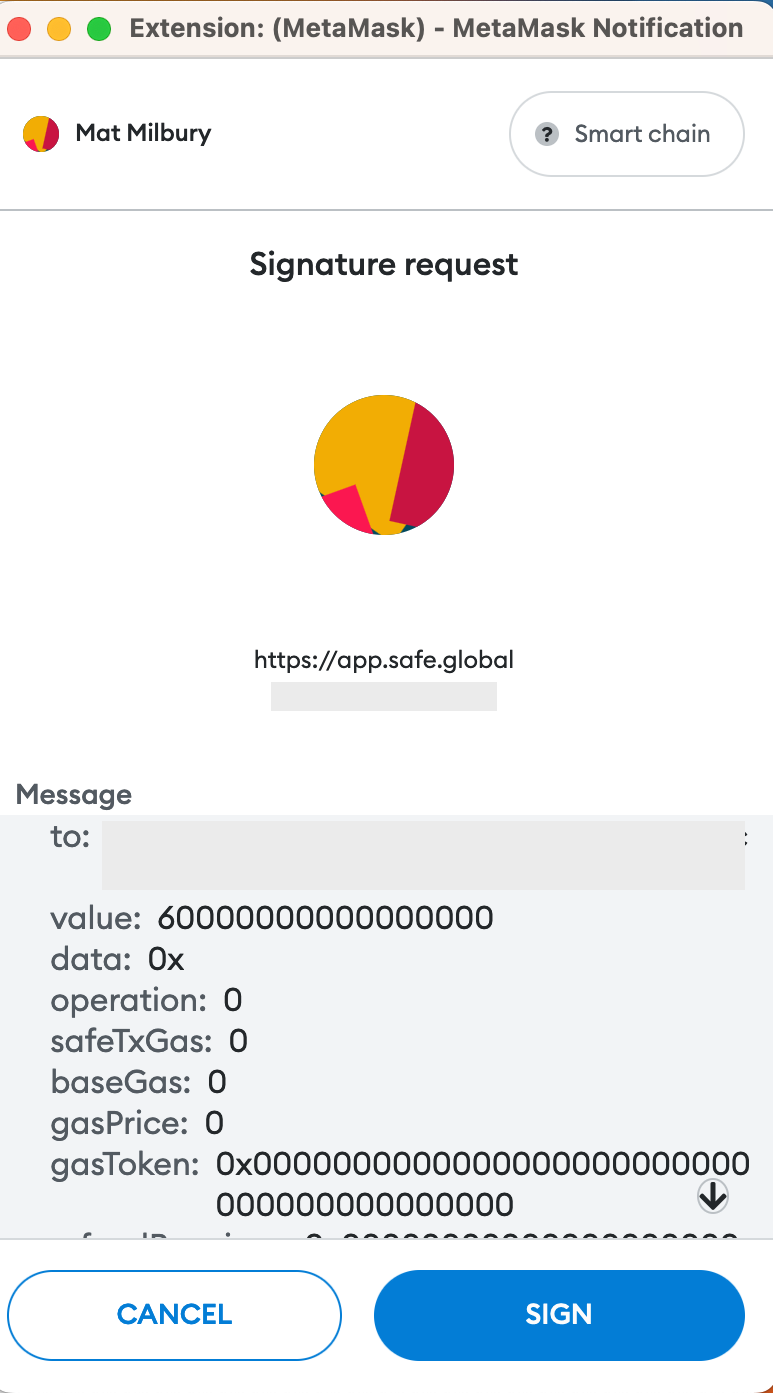
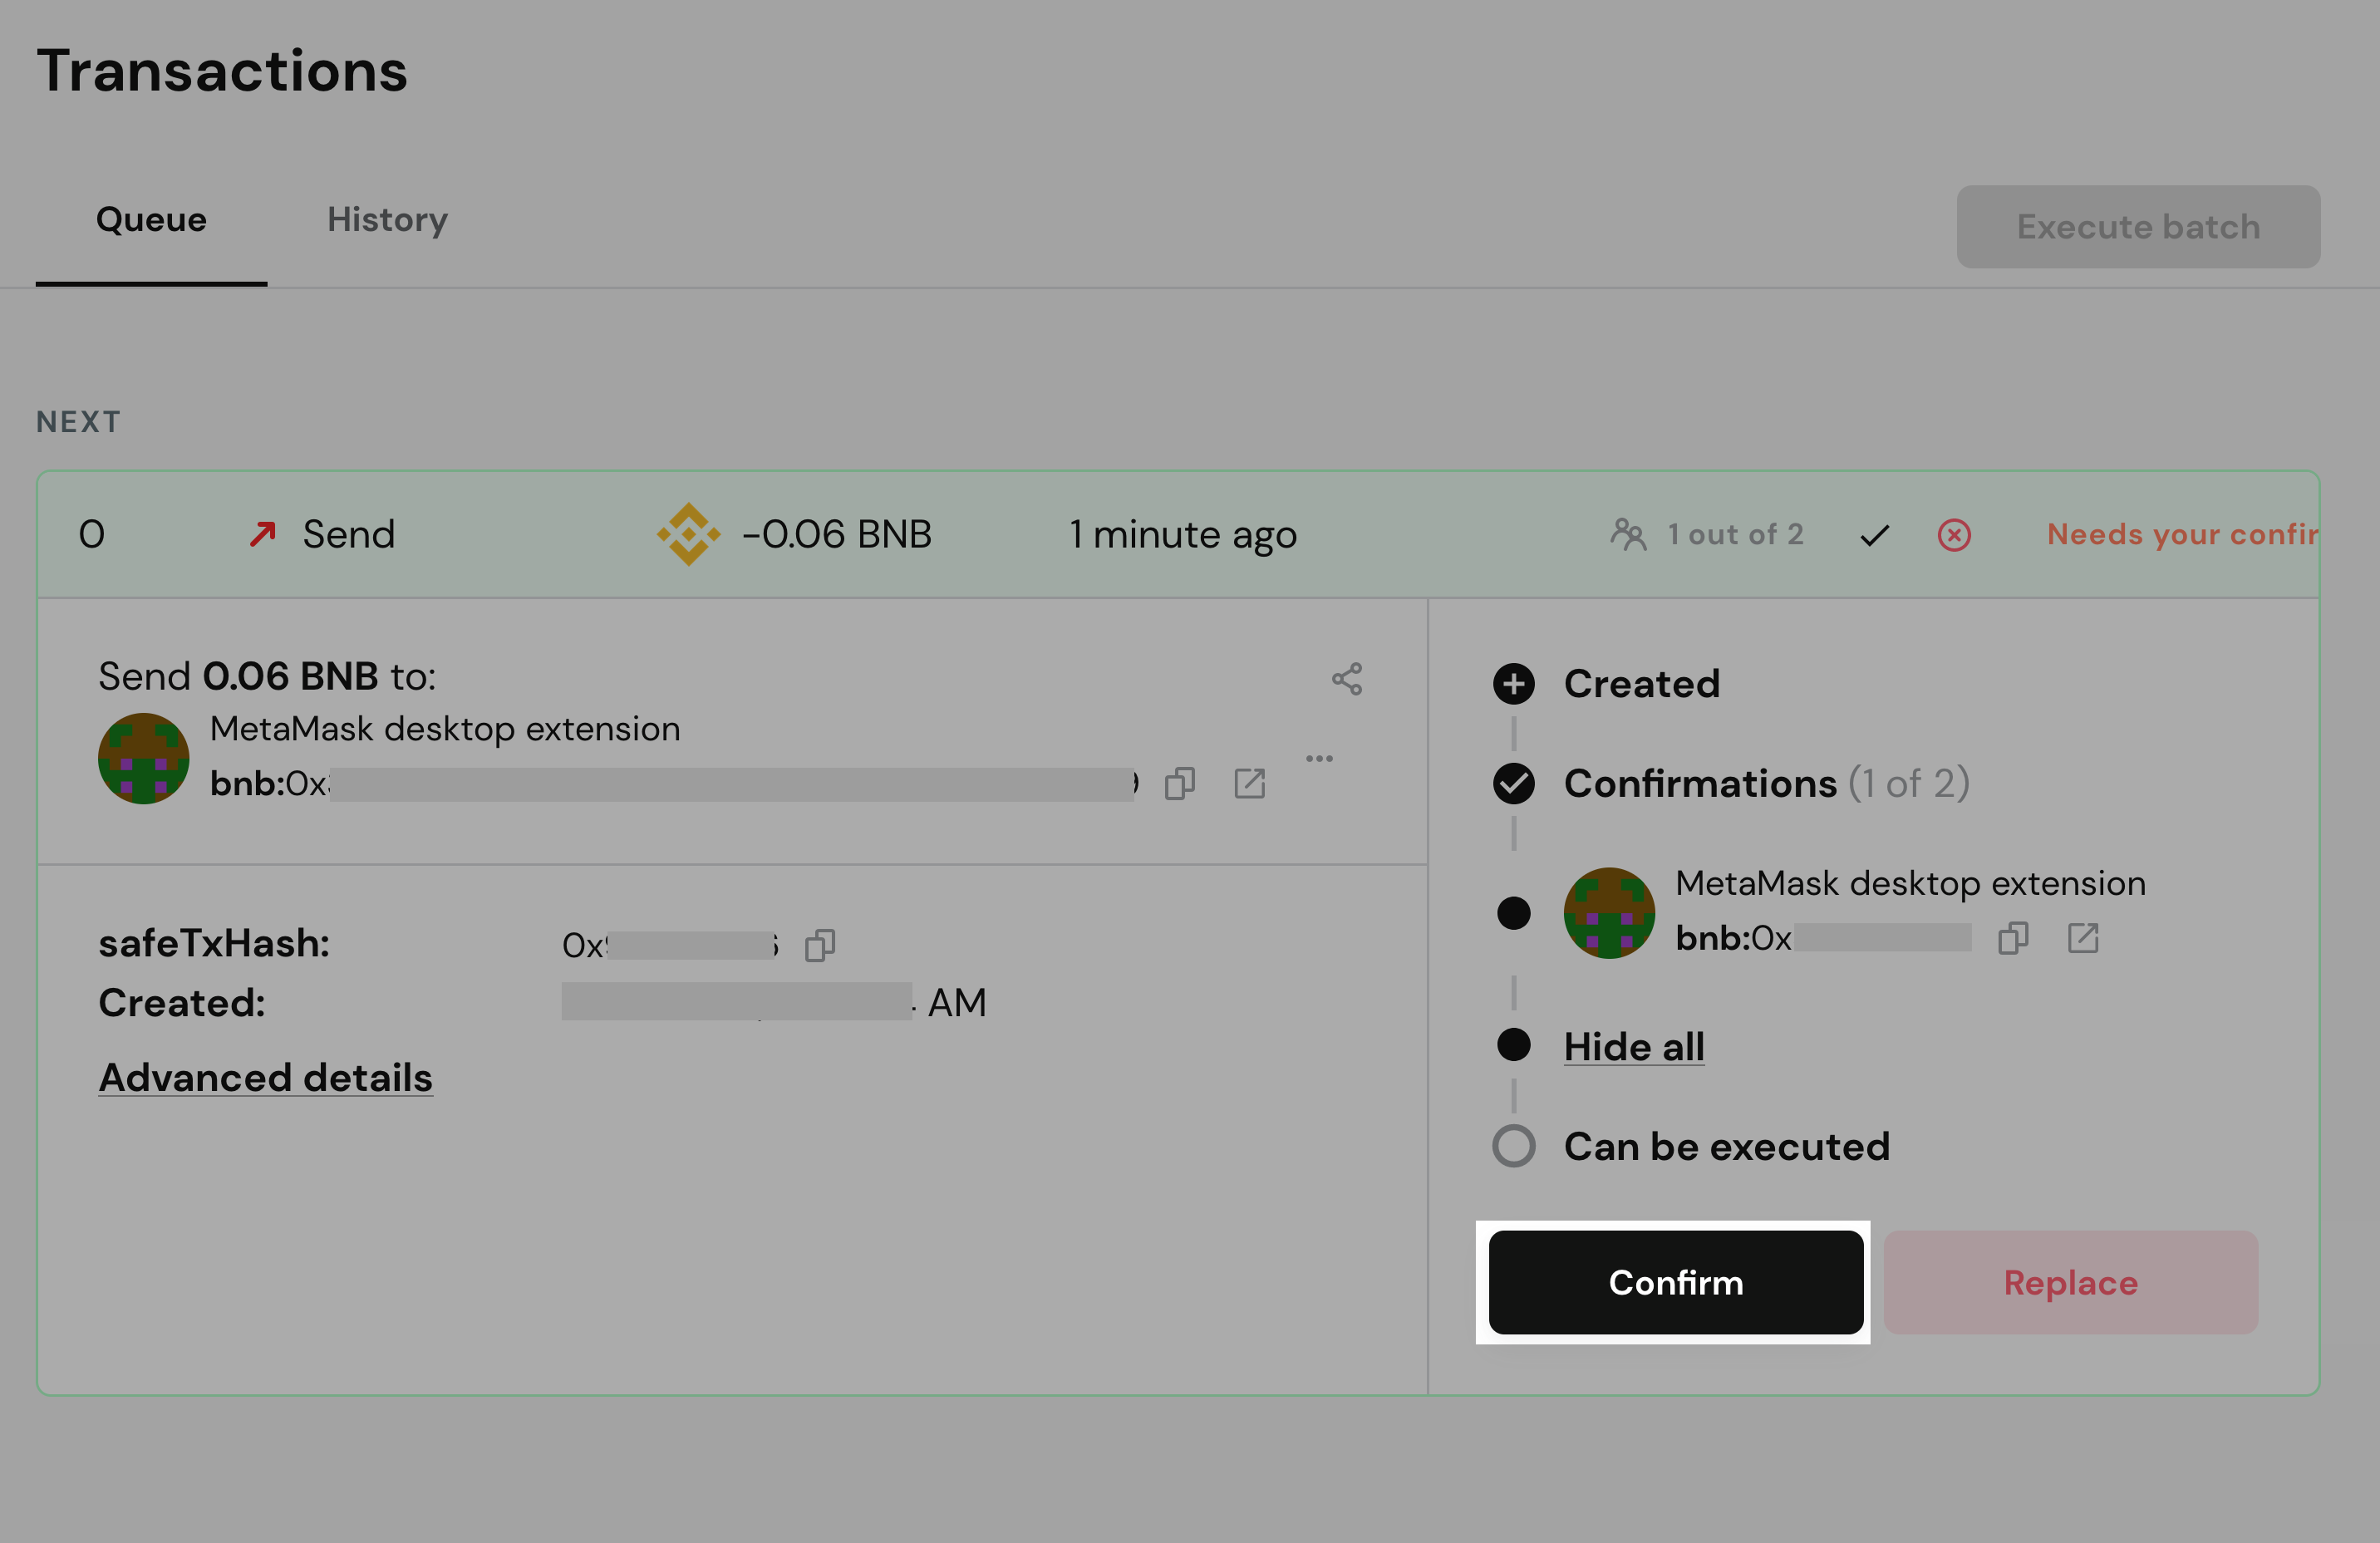
After you sign this message, you should see the following in your gnosis safe app:
See where it says: Confirmations (1 of 2)? Now, you need to connect with one of the other 2 wallets you’ve configured, to provide a final signature and execute the transfer.
Note: the last wallet that signs the transaction pays the transaction’s gas fees.
Step 4: Connect with the other wallet and confirm the transaction
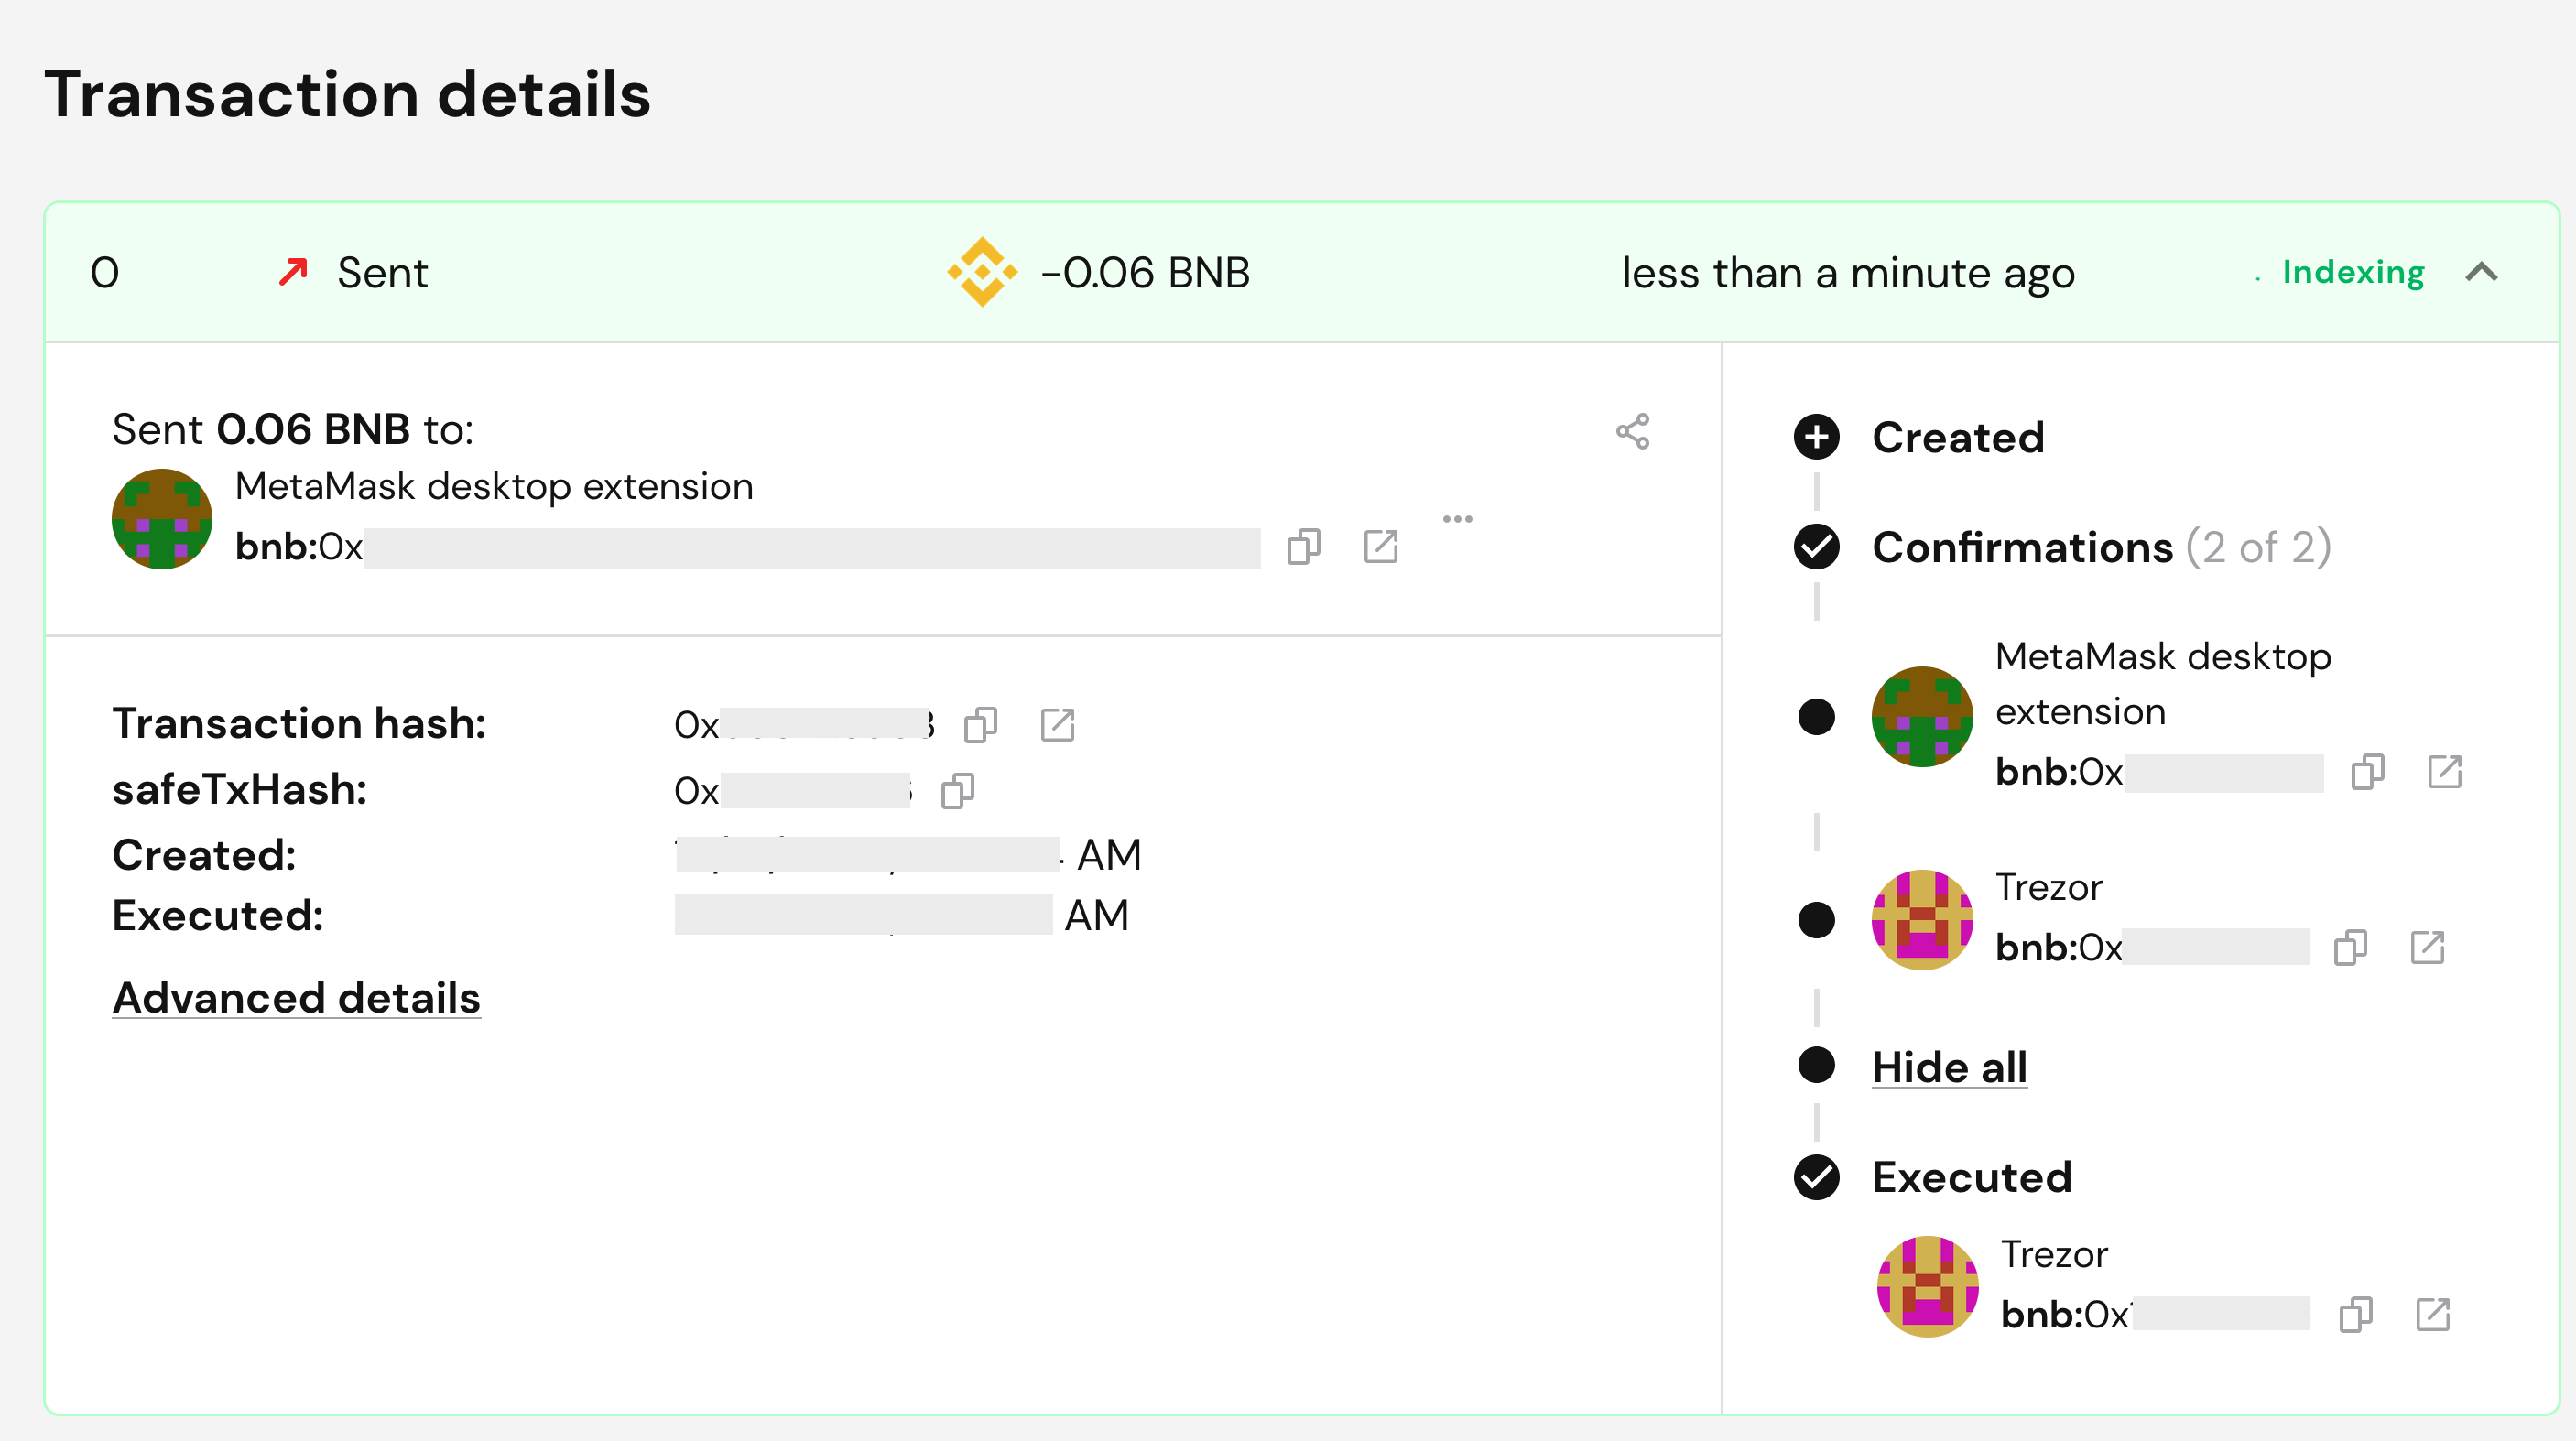
After connecting with the other wallet, the ‘Confirm’ button should be enabled. Click it and confirm the transaction.
After the transaction is processed, you should see in the checkboxes that the transfer was executed.
In retrospect
Note what you just achieved: now you truly don’t have to trust anyone.
You don’t have to trust your computer manufacturer - they can even steal your seed phrase generated in your MetaMask extension - it doesn’t matter, your funds are still safe.
You don’t have to trust your hardware wallet.
You don’t have to trust your mobile phone.
The trustworthiness of either one of these devices is not directly tied to the security of your funds.
Note: While gnosis safe is fantastic for securing your on-chain assets, sharing the ownership with other people, or managing assets of a company, I encountered one use case where I wasn’t able to accomplish what I wanted with it. Dapps that require you to sign the message before using the interface (like OpenSea) usually don’t support Gnosis Safe signatures; therefore, their User Interface can’t be used with it. This is the only limitation I have encountered so far.
I loved the detailed explanation how to setup such multisig environment 🙇♂️ We shall trust the smartcontract though. In your view: How save is this smartcontract? Some additional questions: Would you recommend this setup over a hardware wallet in combination with some multisig? When latter, what is your recommendation for multisig with hardware wallet? Maybe offtopic, you recommend Trezor while many peeps recommend Ledger Nano. What is the reason you dont mention Ledger when talking hardware wallets? BTW, liked the Twitter spaces on security of last week 😉 Oww maybe shall ask above in 10set TGLP discord?